
Last month I shared the exciting news of our son's engagement, and today I wanted to follow up with a tutorial for how I made the lighted marquee sign that hung in our outdoor photo booth spot at the party.

I possibly could have purchased something that would have required much less effort than I spent making this sign, but I had something specific in mind and knew the style and size I was looking for wasn't readily available and/or in the price range I wanted.
To get started, I used a 32x40" foam board, 16" C and K cardboard 3D letters, and an 8" H cardboard letter all from Hobby Lobby. I also ordered this set of battery operated lights because I knew this would be out in the yard and I didn't want to deal with having to plug in a regular set of lights (which would have also been heavier, these were super light weight). There are 2 strings of lights in that set and I used them both. I also used a good x acto/utility knife, low temp glue gun, duct tape, some jute rope, and a decorative border trim.

I won't go into all of the ideas that I had to make this sign that ended up not working for one reason or another, I'll just say that this is the best plan I ended up with! One thing that determined my ultimate design was that the globes for the set of lights could not be removed. I had originally planned to remove them and feed the small light bulbs up through the back of the center of the letters, then reattach the globe. So, I had to come up with a different plan than my original one.
After some thought on various options, here's the method I ussed. I started by carefully slicing off the back/bottom of each letter with the utility knife. Go slowly, and once you get in a rhythm the knife kind of naturally follows the seam and makes it pretty easy. This step is necessary to hide all the wiring from the light string up inside the letter.

Next, they had an "&" that I could have used but I really wanted a "+" so the sign would say "C+K", so I made my own! HL also had a set of letters that were smaller than the 16" initials I used, so I got an 8 inch "H" to create the plus sign. Here's how I cut it- the long side of the H was removed, then I cut a small portion of that off to form the left side of the plus sign. Some hot glue held it together, and I actually also cut off another small square to close up the open right side of the plus sign sign that the original cut on the H had left. The back of the + sign got sliced off as well so it would be open.

Once the letters were prepped, I placed them on the foam board and made sure everything was centered, then I traced around them with a pencil so I would know where to attach them later. You can see the faint pencil lines here-

I needed a way to thread the wires through to the back of the foam board so the wire wouldn't show from letter to letter, and also to feed the battery packs to the back. Once I knew where the letters would be I cut out a section large enough to feed the battery pack through to the back, knowing the hole would be hidden once the letters were attached. I cut where the light string would be ending for the "C", then cut a hole for the "+" and "K" spots as well.

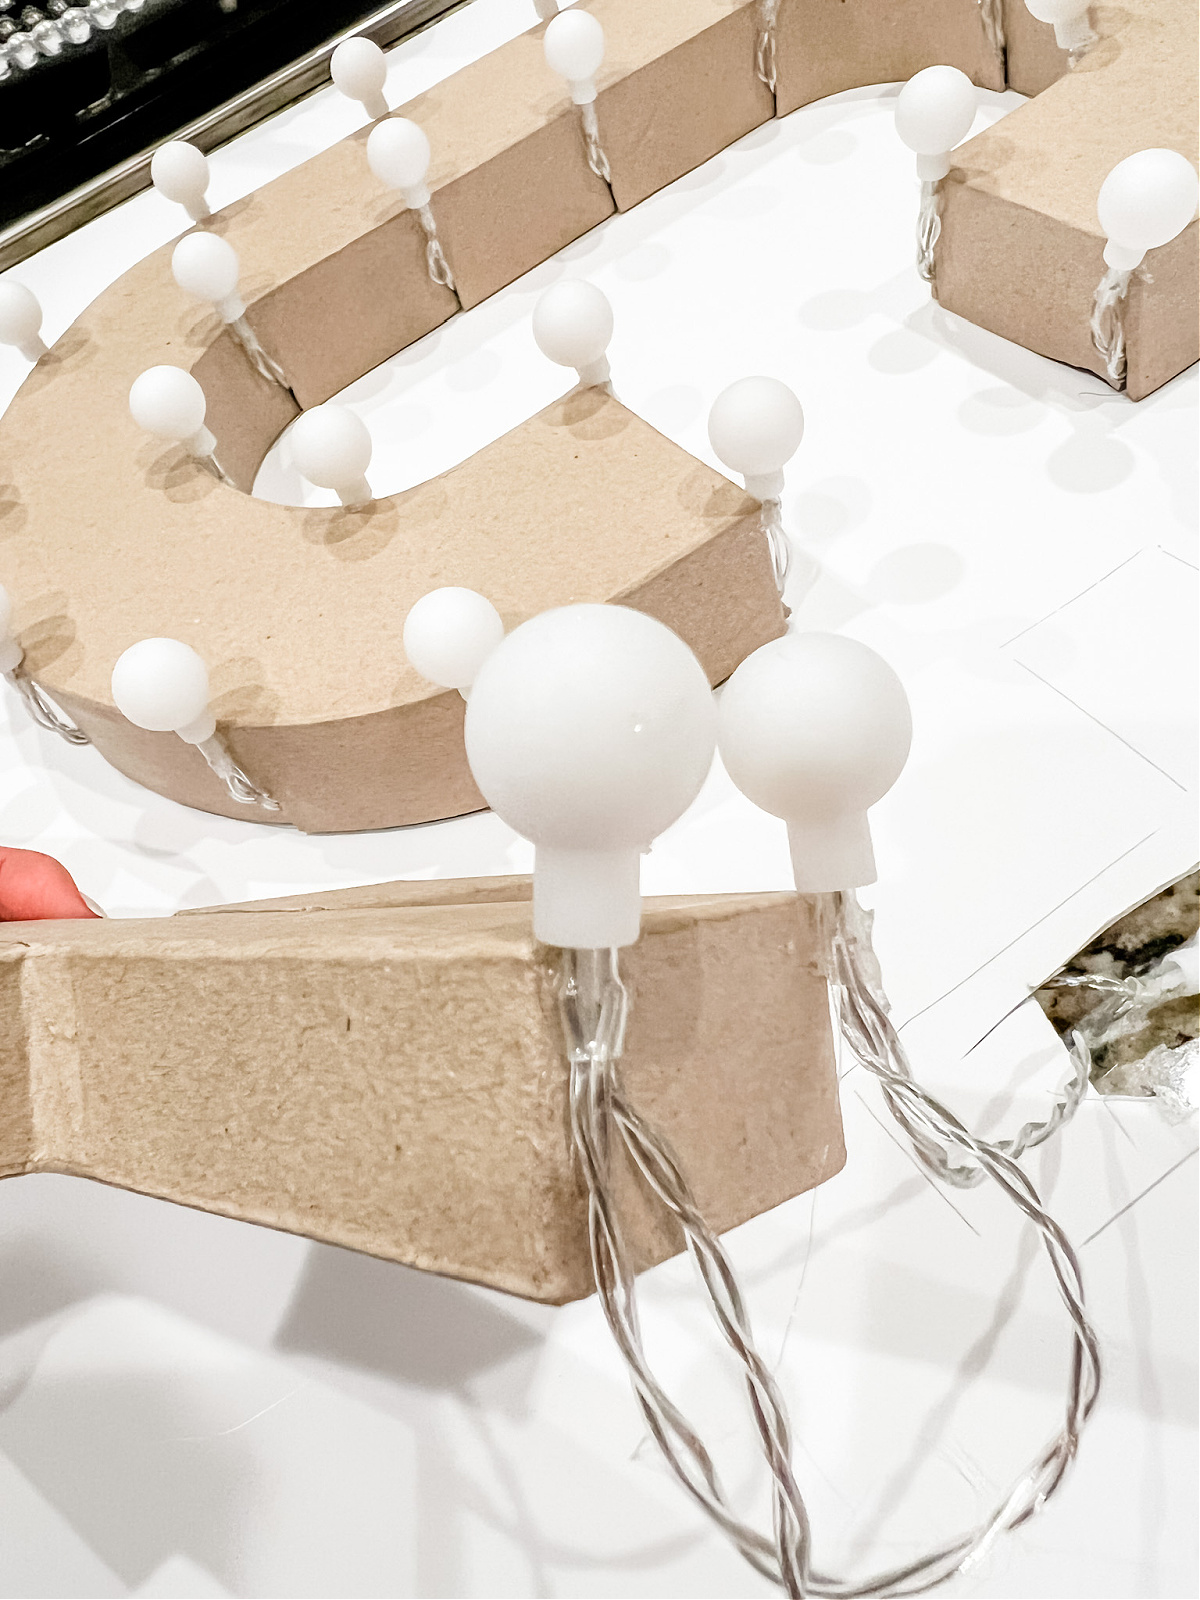
Now I was ready to start adding the lights! Since I couldn't feed the lights through the back to be centered on each letter like I originally thought, I decided to outline each letter with lights. I honestly just eyeballed it and used a small drop of hot glue to attach each light around the edges about 2" apart, adjusting here and there depending on the shape of the letter to what looked right to my eye. Once the lights were secured around the edge, I carefully made a slit on the side where each light was and pulled the wires inside the letter as much as possible.


After the "C" was finished, I fed the remaining sting and battery pack through the hole on the board and put the "C" in its place on the board, matching it up with the pencil outline and hot gluing it into place.


Then, I fed that all up through the hole for the "+" sign and repeated the process to outline it with lights.
Once the lights on it were finished I fed the battery pack back through the hole. I can't remember where the first light string ended but I think there was a bit left after the finishing the "+", but I just taped the rest to the back, along with the battery pack, and started with a new string for the "K", repeating the same process again. Here's what the back of the letters looked like with the wires all tucked in-

After the"+" and "K" were finished and glued in place and all of the wires and battery packs were threaded to the back, I had quite a good deal of the second light string left so I ended up running the lights around the outer edge of the foam board as well. I attached them with a dot of hot glue along the edge just like I did with the letters. In hindsight, they were very pretty easy to pop off as the sign was handled and moved around, so I should have used a small strip of duct tape to secure the position of each light around the edge as well. I added that after the fact when a few of the outer rim lights got knocked loose. I secured any leftover lights and the battery packs to the back with duct tape, and also attached the remote for the lights to the back of the sign with duct tape so it would be easy to keep up with.

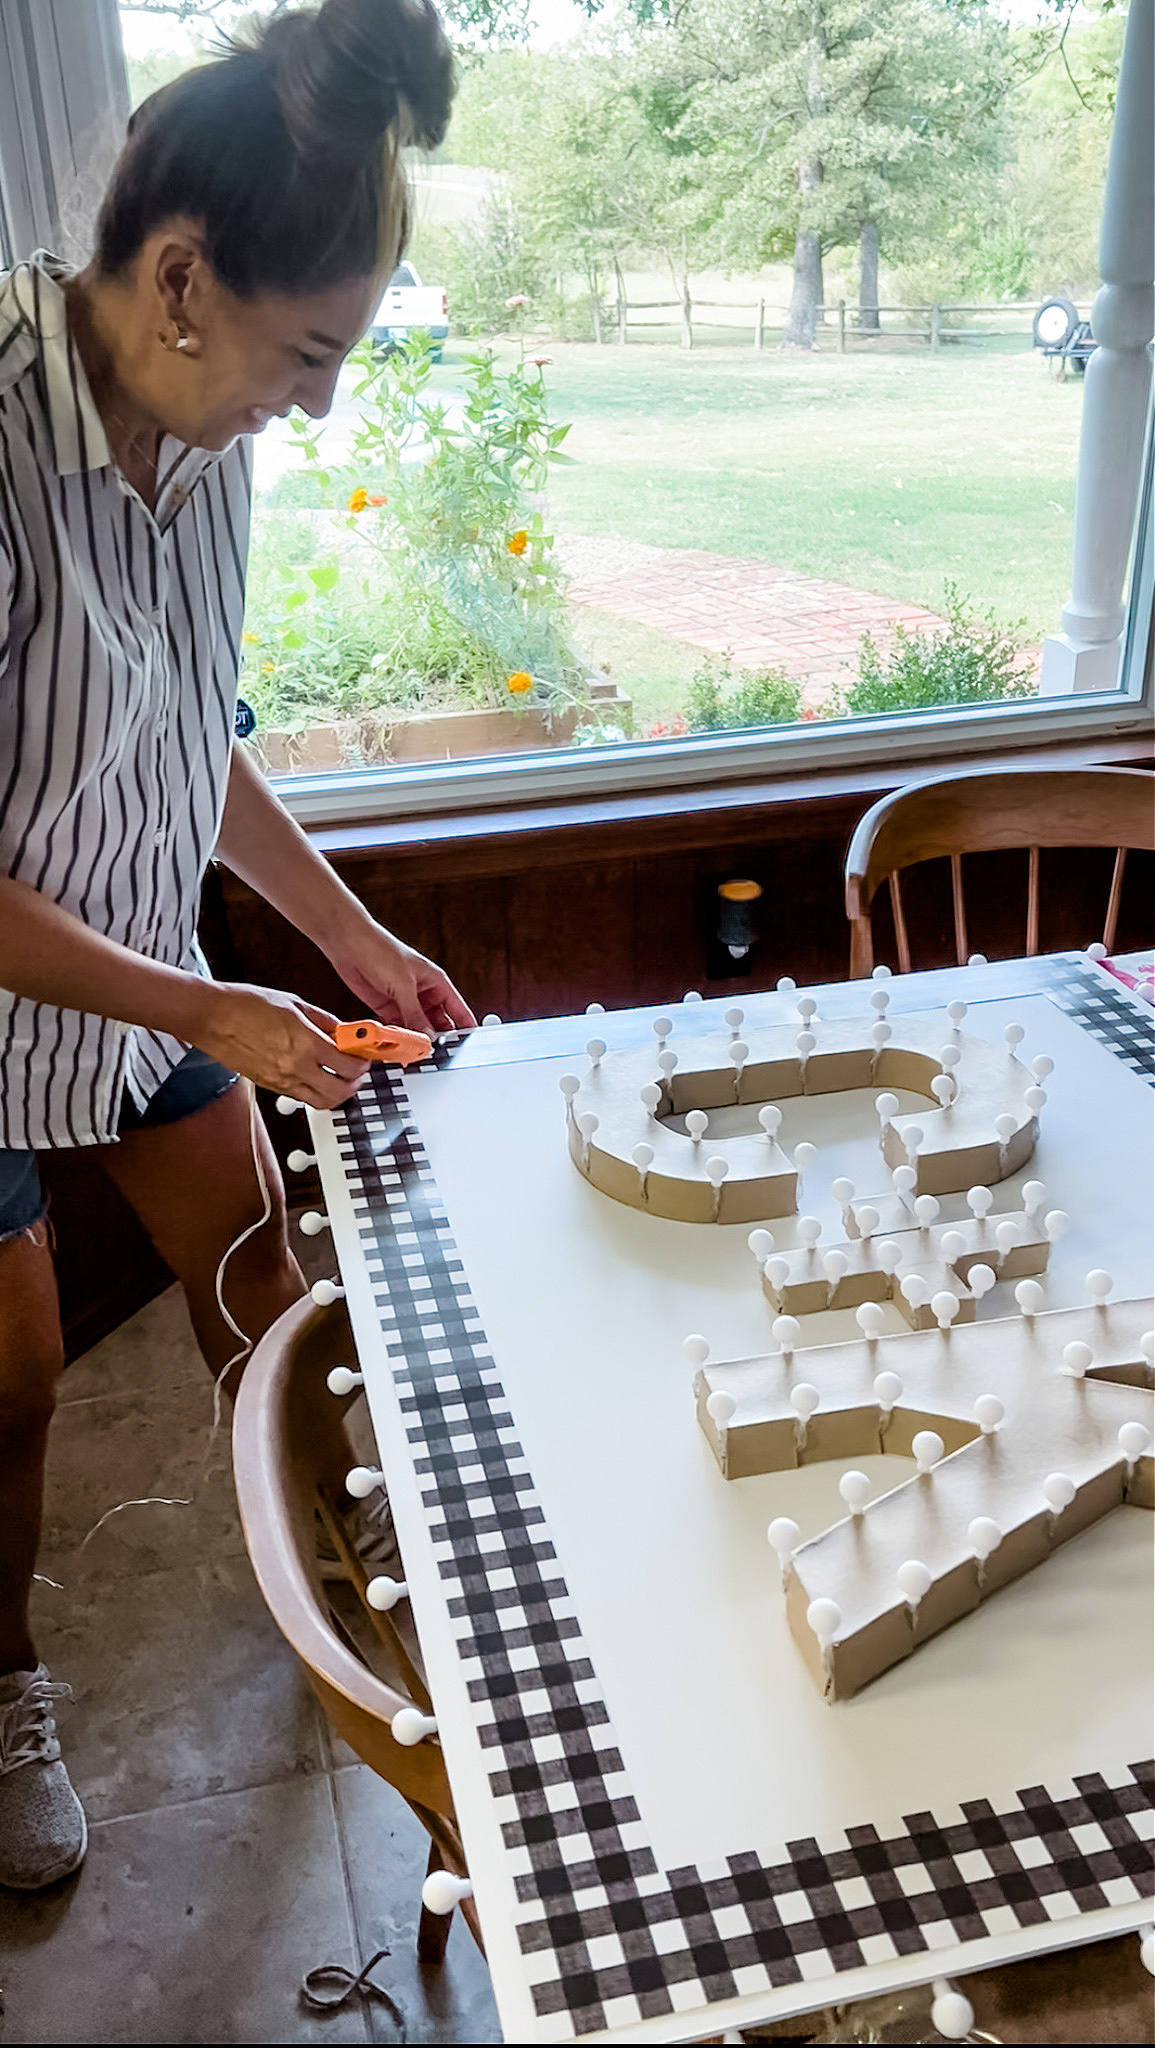
You know I had to add a little extra so I used some gingham border strips around the edge to frame it out. You could also use strips of wrapping paper, wallpaper, or nothing at all, but here are tons of other cute bulletin board borders that make it easy to find something to match the colors you want. I picked mine up at Hobby Lobby when I saw it with the classroom 90% off clearance. At the time I didn't have a clue what I'd use it for but knew it would come in handy for something, and it sure did just a few weeks after I bought it! (I had to grab this photo from a video screenshot so it's not great...)
To hang the sign, I used jute rope and this time used my high temp heavy duty glue gun to glue it to the back of the sign, then when it dried I covered that with duct tape as well. With our ever-present Oklahoma wind I knew that it would be blowing around some and I didn't want the rope to come undone and peel off of the back of the sign!
I cut really long pieces of rope and we tied it up the the trees. The hardest part was getting it to hang straight- ha!

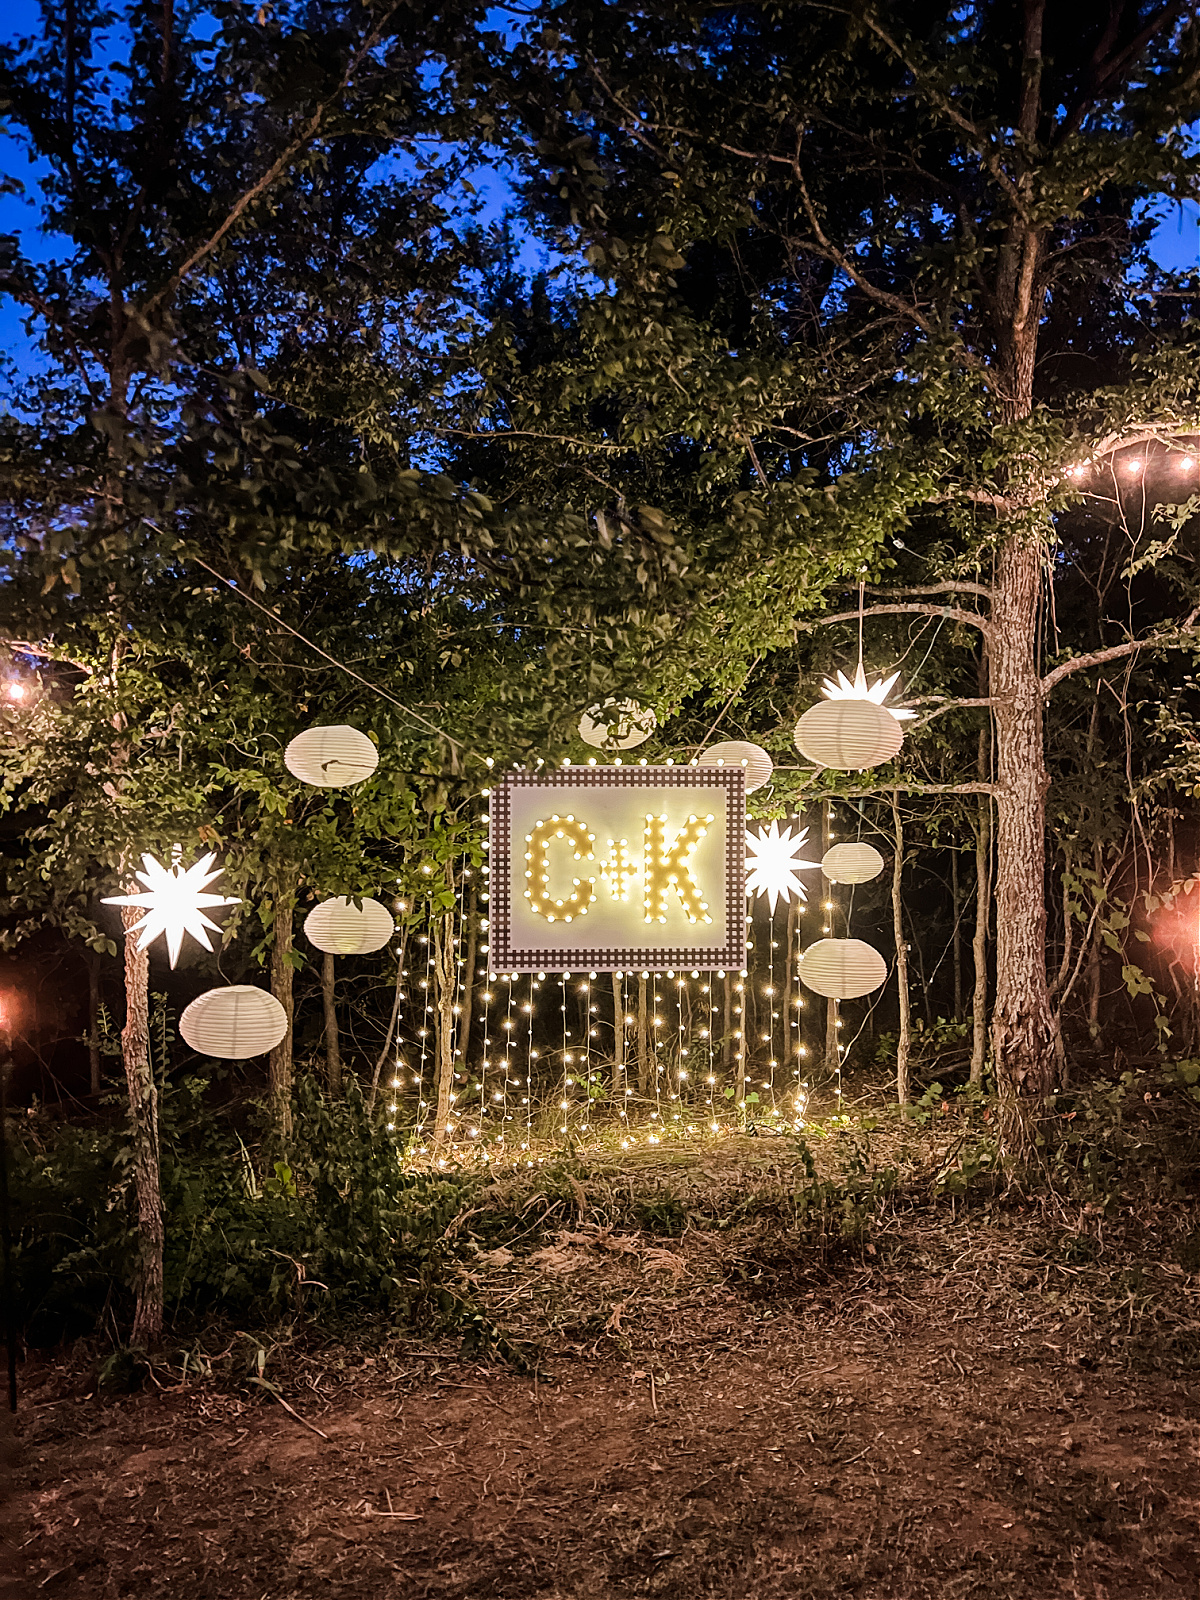
I'm so pleased with how it turned out, it ended up being so cute for photos, especially when it started getting dark.


We also used some curtain lights behind the sign, some paper lanterns (which I thrifted and didn't realize they didn't have the wire frames for the inside, so they hung a bit more like UFOs than globes- ha! but it was ok!), and some 3D lighted moravian stars that I bought several years ago for Christmas. (Oh, and I bought these tiny lights for another idea that didn't work out but ended up using them inside the paper lanterns. We glued a couple inside the bottom rim of each lantern and it helped illuminate them in the dark as well. They are really cool little lights and and are for a one time use but they lasted for several days!) It truly was magical as it got dark that evening!
Here are some similar things if you'd like to try to make your own, and a few other products if you want the look but don't want to DIY it! (FYI, pay attention to size on the lighted letters I linked, they are different mine but about the only options I could find ready-made.) The inexpensive marquee lightbox that I've shared from my daughter's college room would also be a cute small tabletop or wall decor piece for a wedding or engagement party!


Never miss a post!
Subscribe to Dimples and Tangles and receive notice in your inbox each time a new post is published. Click here to subscribe!

What a remarkable feat of engineering! Love it!!
ReplyDeleteWOW! This is definitely a labor of LOVE! Not surprised coming from you Jen.........awesome job!!
ReplyDeleteAbsolutely perfect! You’re amazing at any DIY but this one seems to have been more engineering than most. You didn’t tell us about your degree from MIT! 😂 I’m sure the kids loved it as well as everyone in attendance.
ReplyDeletexo
Pat