
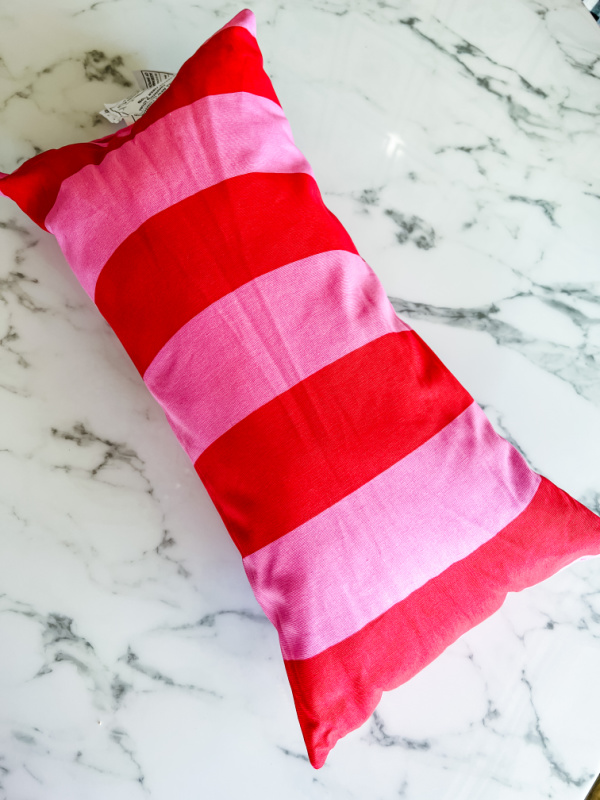
A few weeks ago I came across the cutest red and pink striped pillow for a steal! Actually, the fabric was cute but the pillow was flat and lumpy. I picked up two anyway and figured I could zhush them up to make them look better. They were sewn closed and I knew that they would look 1,000 times better with a down insert and a zipper closure. So here is how I turned that cheap lumpy store bought pillow into a chic pillow cover with a zipper closure, and I did it without sewing a stitch!

Here is my pillow in its original state. Loose, flat, and lumpy but it was fabulous fabric and with the $4.99 Ikea price I couldn't walk away!

I started winging it with a plan to add a zipper to this pillow. I knew that I could open the seam, put in a better insert and sew it closed again, but I prefer the flexibility (and easier storage) of zipper covers so I can just remove the cover and fold it flat when not in use. I pulled out some zippers (I didn't care if the color matched perfectly, it never shows) and centered it on what would be the bottom seam so I could determine how big of an opening I would need.

You'll need a seam ripper like this or a small, sharp pair of scissors.

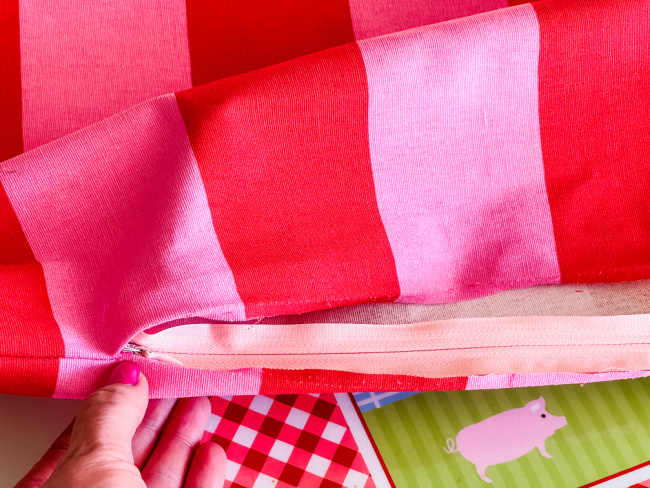
Carefully cut the stitches to open the seam, just long enough for zipper. Try to stop where the zipper actually stops zipping on each end- don't make your opening the exact length of the entire zipper, just a little shorter.

Ahhh, that's why it was so lumpy!

Now the pillow is all cleaned out and the seam is ready for the zipper.

Close the zipper, and line the edge of the teeth up with the turned under seam edge of the pillow. There should already be a nice seam crease pressed in the fabric from where it was sewn shut, so just work with that. Line up the zipper pull right to the start of the opening.
Then- (did you know this was coming?)- I just used my hot glue gun to attach it! I could have pulled out my sewing machine but that would have added more difficulty and time to this project I wanted to be quick and easy! It's definitely an option though if you're a seamstress and want a more professional result- I didn't mind a hot-glued in zipper for this project. 😁
It's risky and you have to be extra careful, but I chose to use my high-temp glue gun for this. A low-temp should work almost as well but I think that the higher temp makes the bond with fabric extra strong. I don't want the zipper seam pulling loose with the pressure it will have on it, so that's why I opted for the high temp glue.
Since I was having to be extra careful so I wouldn't burn my fingertips off, I worked in a very small section at a time,. beginning with applying just enough glue to the end of the zipper to get it started and hold it in place. (This glue gun has seen MANY a project... sorry it's not too pretty, ha!)
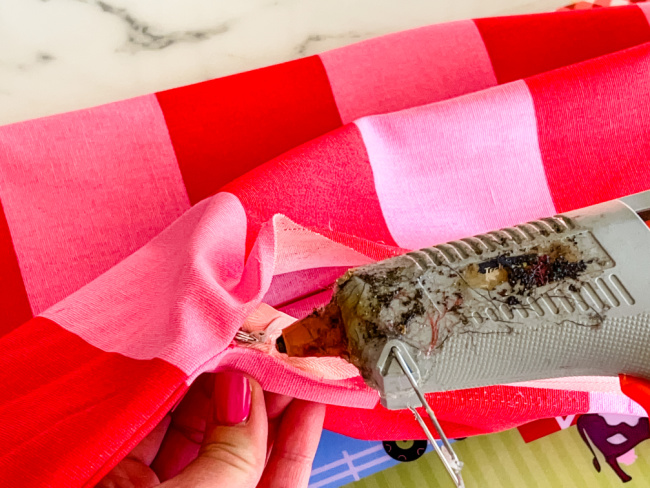
Then, I slowly worked down the edge bit by bit. I applied the glue to the edge of the zipper, then pressed the seam of the pillow cover down onto that until it dried. Be careful not to get the glue too close to the teeth of the zipper, and consider that the glue will spread a little when you press the fabric to it so make sure to stay clear of getting any on the teeth opening. Once you get past about 1/2 of the length of the zipper glued down, zip it open if it's easier to work it that way. I went back and forth between it being open and closed.

Here the first edge is glued in, then I flipped the cover over and repeated the process to glue the other edge of the zipper in place.

After both sides of the zipper are glued in place, I turned the cover inside out a little and glued the very ends of the zipper down a bit too, just for some extra reinforcement since the zipper will get pulled on the ends when opening and closing it. So here's the zipper all glued in place-

Done and ready for an insert- after a good press with the iron! This cover measures about 11x22" and it's a bit of an odd size when trying to find the right insert. Something around 14x24 would have been just right, but that size can be hard to come by. The insert I had on hand was an Ikea down 16x26 and a bit large and tough to stuff in, but it worked and it's extra full. And, I guess that's a good test of my glued-in zipper... the cover is stuffed extra full and the zipper seam didn't budge!

Now because I can't leave well enough alone, it needed just a little something extra... let's make some pom poms for the corners!

I used red and pink yarn together and followed the procedure in my Pom Pom Tutorial, with one exception. Rather than just wrapping the yarn around my fingers as shown in the tutorial, this time I used a scrap of cardboard as a template. The cardboard I used was about 4" to give you an idea of the size. In hindsight since we've lived with these pillows for a few weeks now, they're probably a bit too big, I should have made them around 3" or a little smaller... they're just a little heavy on the corners and can tend to flop over a bit. I'm still happy with them but something to consider if you're trying this project.
Since I used two colors I just held both pieces of yarn together and pulled them from their skeins at the same time, wrapping them both around my cardboard template together. I wrapped each pom about 80 times (which would equate to 160 wraps with only one color of yarn) and they were nice and full. If you are making a smaller pom you don't have to wrap it as many times for it to be full, I just wing it.
I didn't take photos of the pom pom process, but I did share a quick video on Instagram and I thought you might like to see here as well, hope it's helpful!


To attach the poms I used my glue gun again. I spread the yard out on a section of the pom until I got down to the center. I found it easier to apply a good dab of glue to the corner of the pillow cover, then pressed my center opening of the pom down onto that (careful that the glue doesn't spread through the yarn when you're pressing to attach the pom and burn you!) and held it in place until it fully dried. You could also hand stitch these on if you're more comfortable with that.
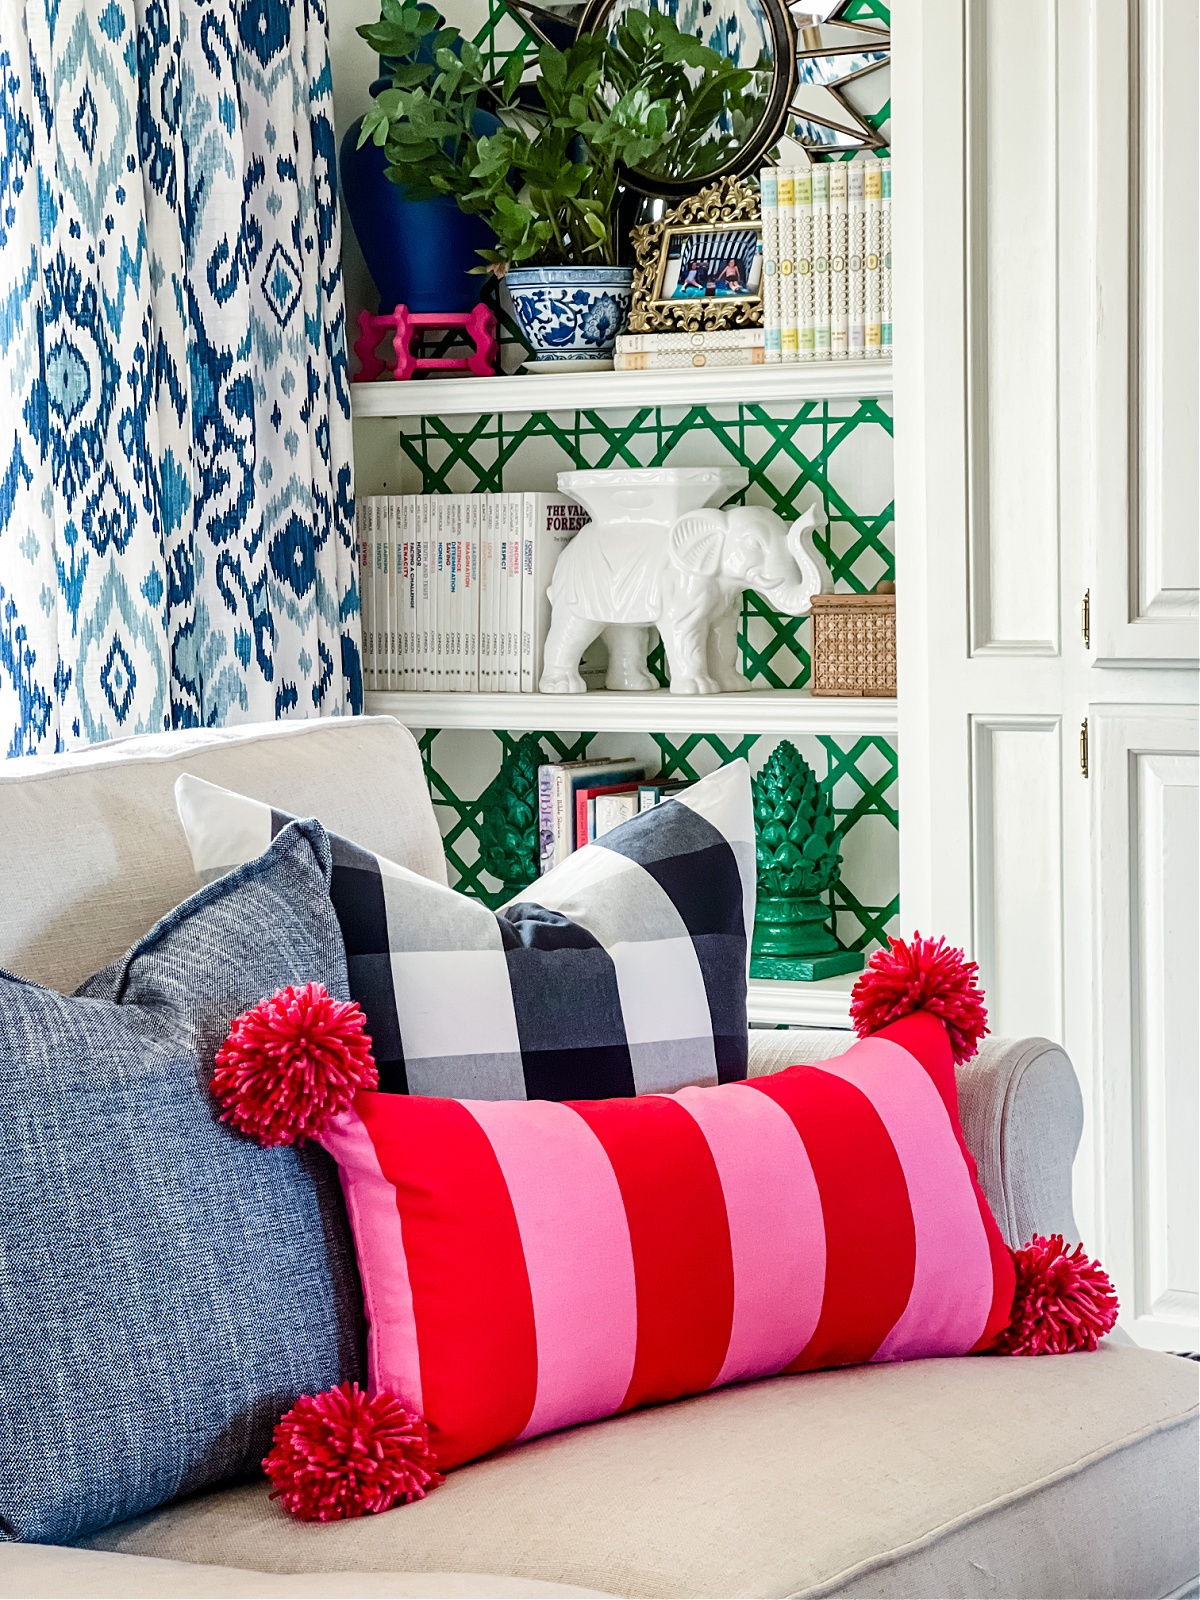
So there you have it... $5 Ikea pillow taken from "meh" to marvelous!!


I love your blog! Have you ever found pillow inserts that are firm? I'd like some firm ones for the pillows I lean on every day on the sofa, and all I have is squishy down ones. Thanks in advance for any ideas!
ReplyDeleteAnne
Hmm, that's a good question! I have not but if I come across something I'll share. The only thing I might try if you still want to be able to fluff them back up is to try an insert that's quite a bit larger than the cover. Really stuffing it in there makes the pillow more firm. Like these striped ones- my insert was much too large and they aren't quite as squishy as a smaller insert would have been. Still not as firm as something like a foam insert would be but maybe a bit better?
DeleteHave you seen the Surebonder Fabric Glue Sticks? They would work well for this.
ReplyDeleteI have not! These worked great but I'll have to look for those. Are they for a low temp glue gun?
Delete