
Today I'm joining a small group of fellow home bloggers hosted by Annie of Most Lovely Things to share a little Spring Refresh project with you. My project isn't specifically related to "Spring", but Spring is always when I get the biggest itch to change things around in the house and my "to-do" project list gets even longer. So, I thought this would be a good opportunity to knock out a project that's been on that list for months! If you're looking for Spring specific ideas, check out my Spring Home Tour from my last post.

(*This post contains affiliate links, including Amazon. As an Amazon Associate, I earn from qualifying purchases. Read my full disclosure policy here.)
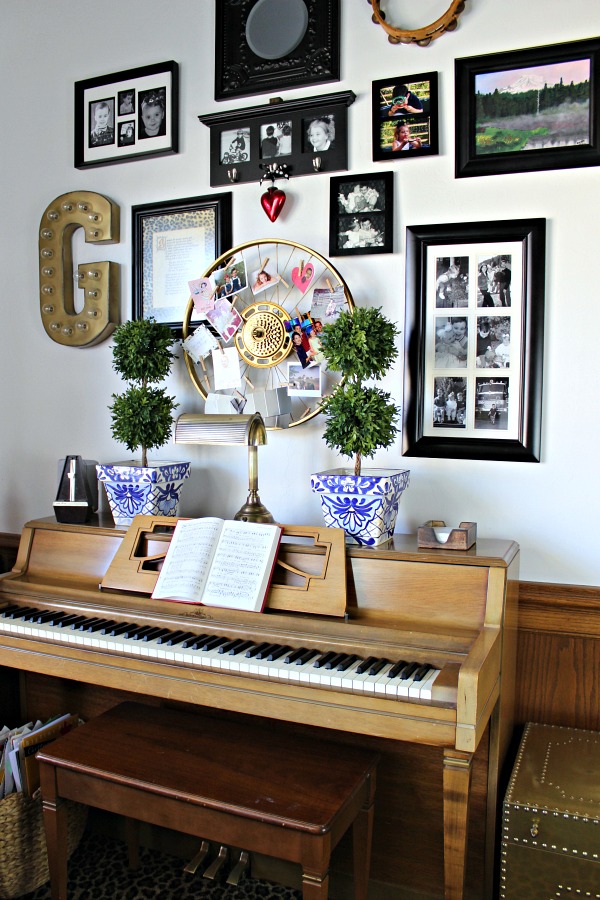
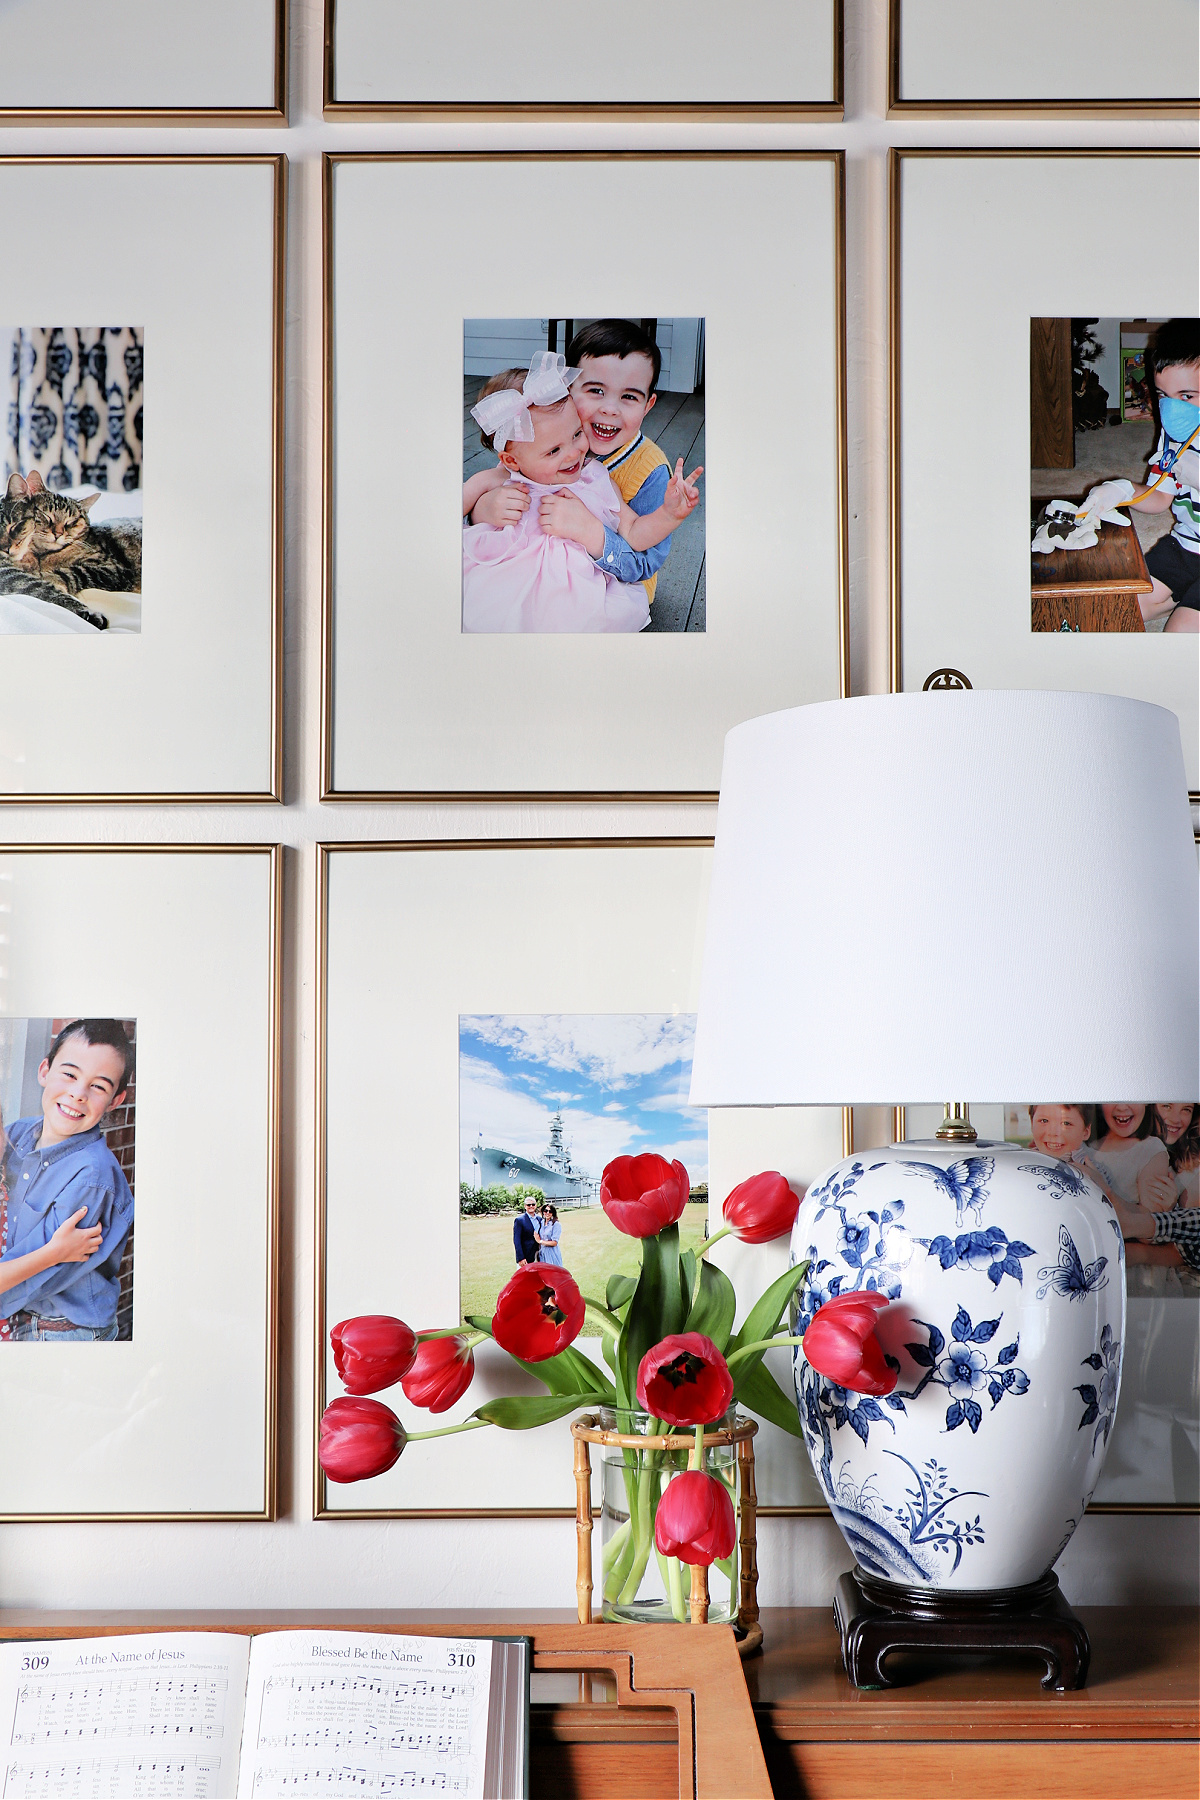
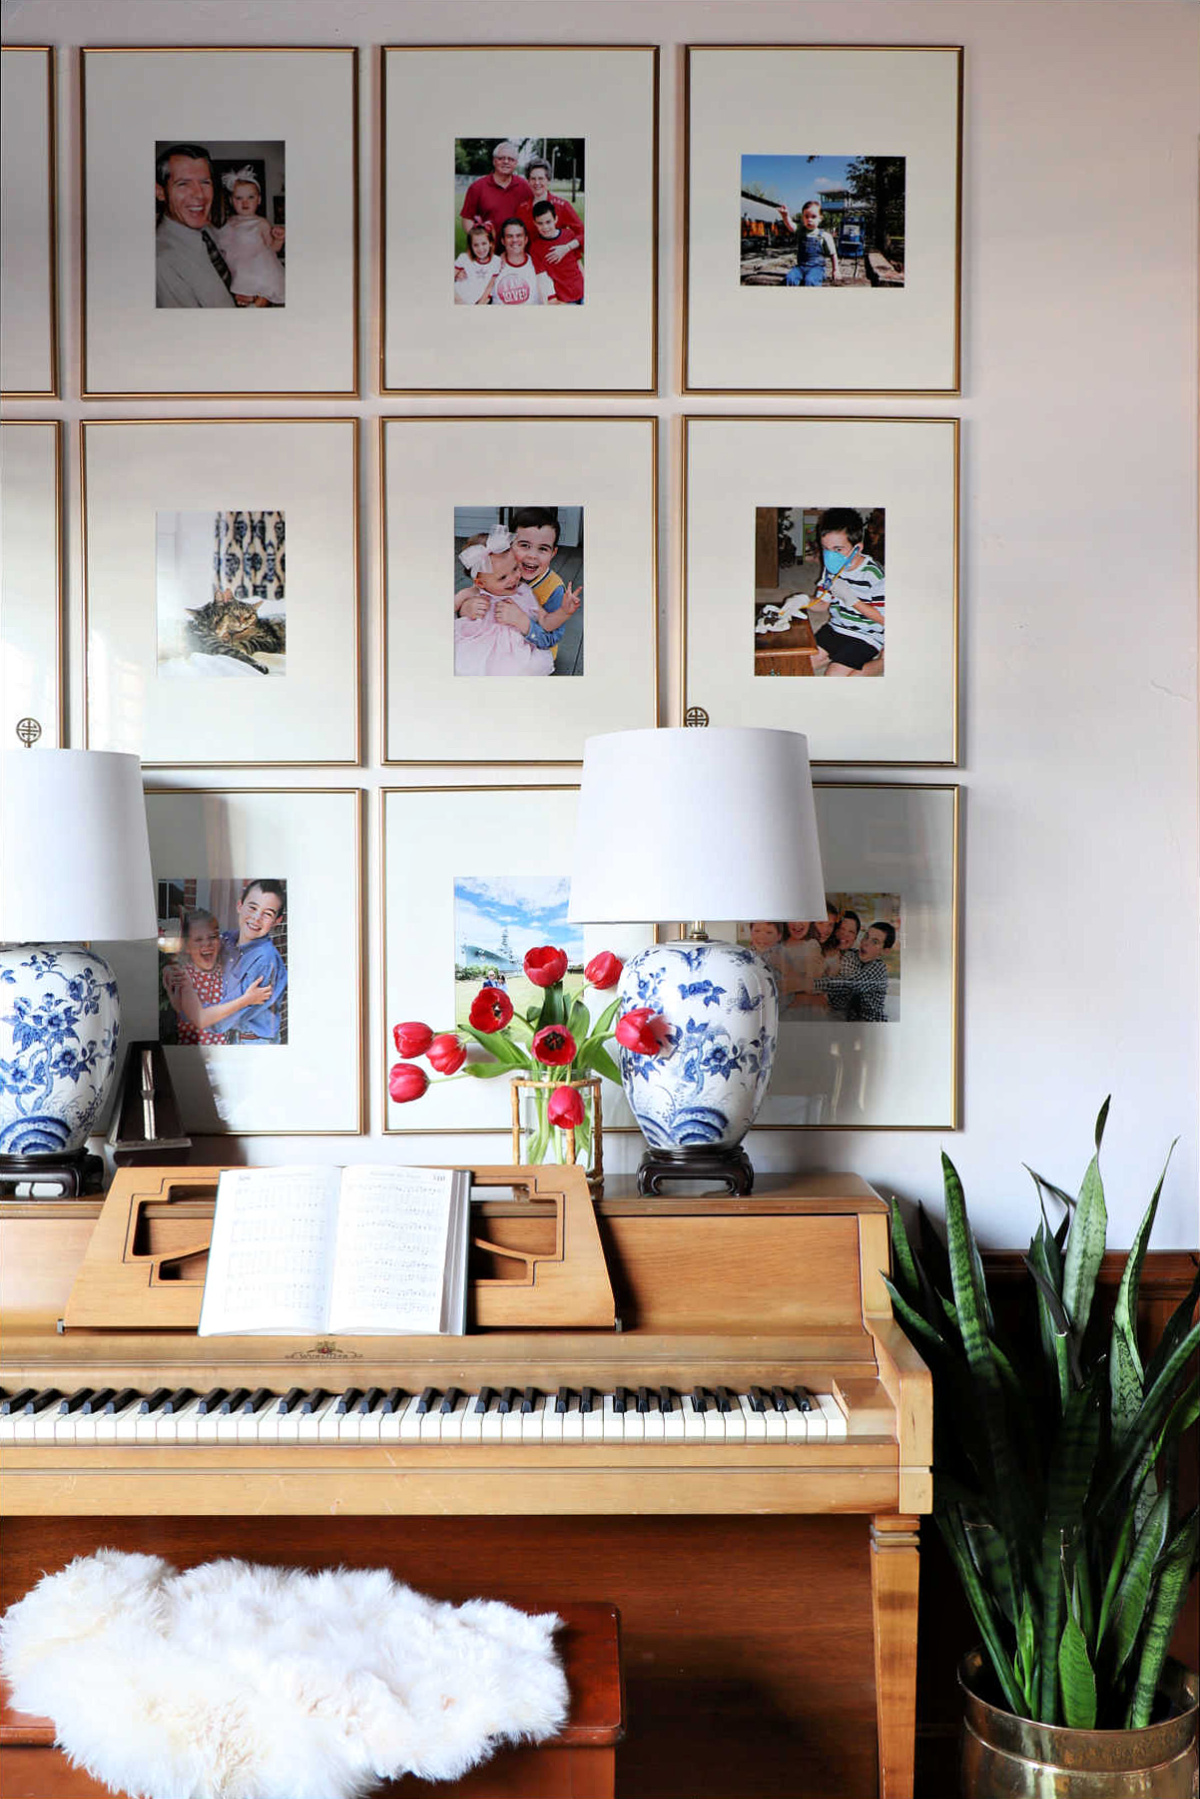
Last Fall I came across some great 16x20 wall frames that were on major clearance at Hobby Lobby. I'd been wanting to do a large grid photo gallery wall in my hallway for a while, so I drove from store to store all over town and gathered up around 20 frames. As I began planning this project and laying out what I wanted to do in the hall, it just wasn't coming together and working out how I had envisioned it. So, I started thinking of a Plan B and decided that it was past time for this wall in our Office/Bonus Room to get a makeover. We're just a few months shy of living in this house for 15 years, and although it got some new paint and carpet early on this room is the last one waiting for it's big makeover. So, this wall has been this way for at least 10 years(!) since we did the initial fresh paint. It was starting to feel a bit stale and while I pulled this photo from a previous post, in reality this corner had become a bit of a dumping ground... stacks of music, games piled on that trunk, books to be reshelved, a few pieces of artwork removed from this spot and used elsewhere... it was past time for a clean sweep!
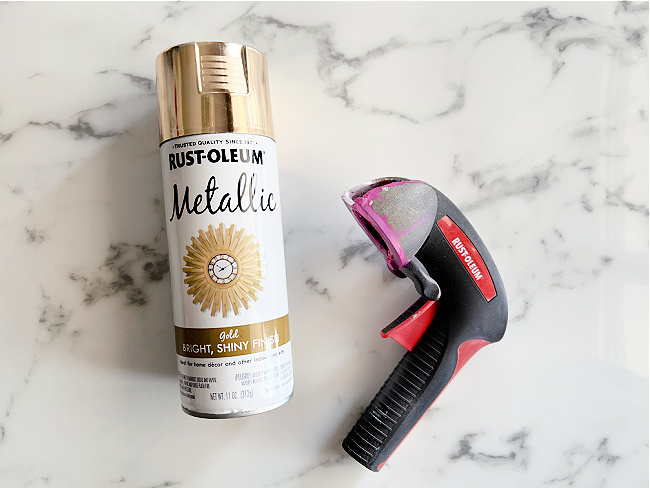
Now, I mentioned I gathered up a load of frames for a steal but there was one hitch- they were all black and silver and I knew I'd want them to be gold. So, I removed the glass and backing from all of them (thankfully they were easy brackets to pop open!), loaded up on my trusty gold spray paint and got to work! This spray trigger handle is a lifesaver when there is a larger spray paint job to do- no more numb fingers from pressing the button down for long periods of time!
More link options and supply list at the end of the post!
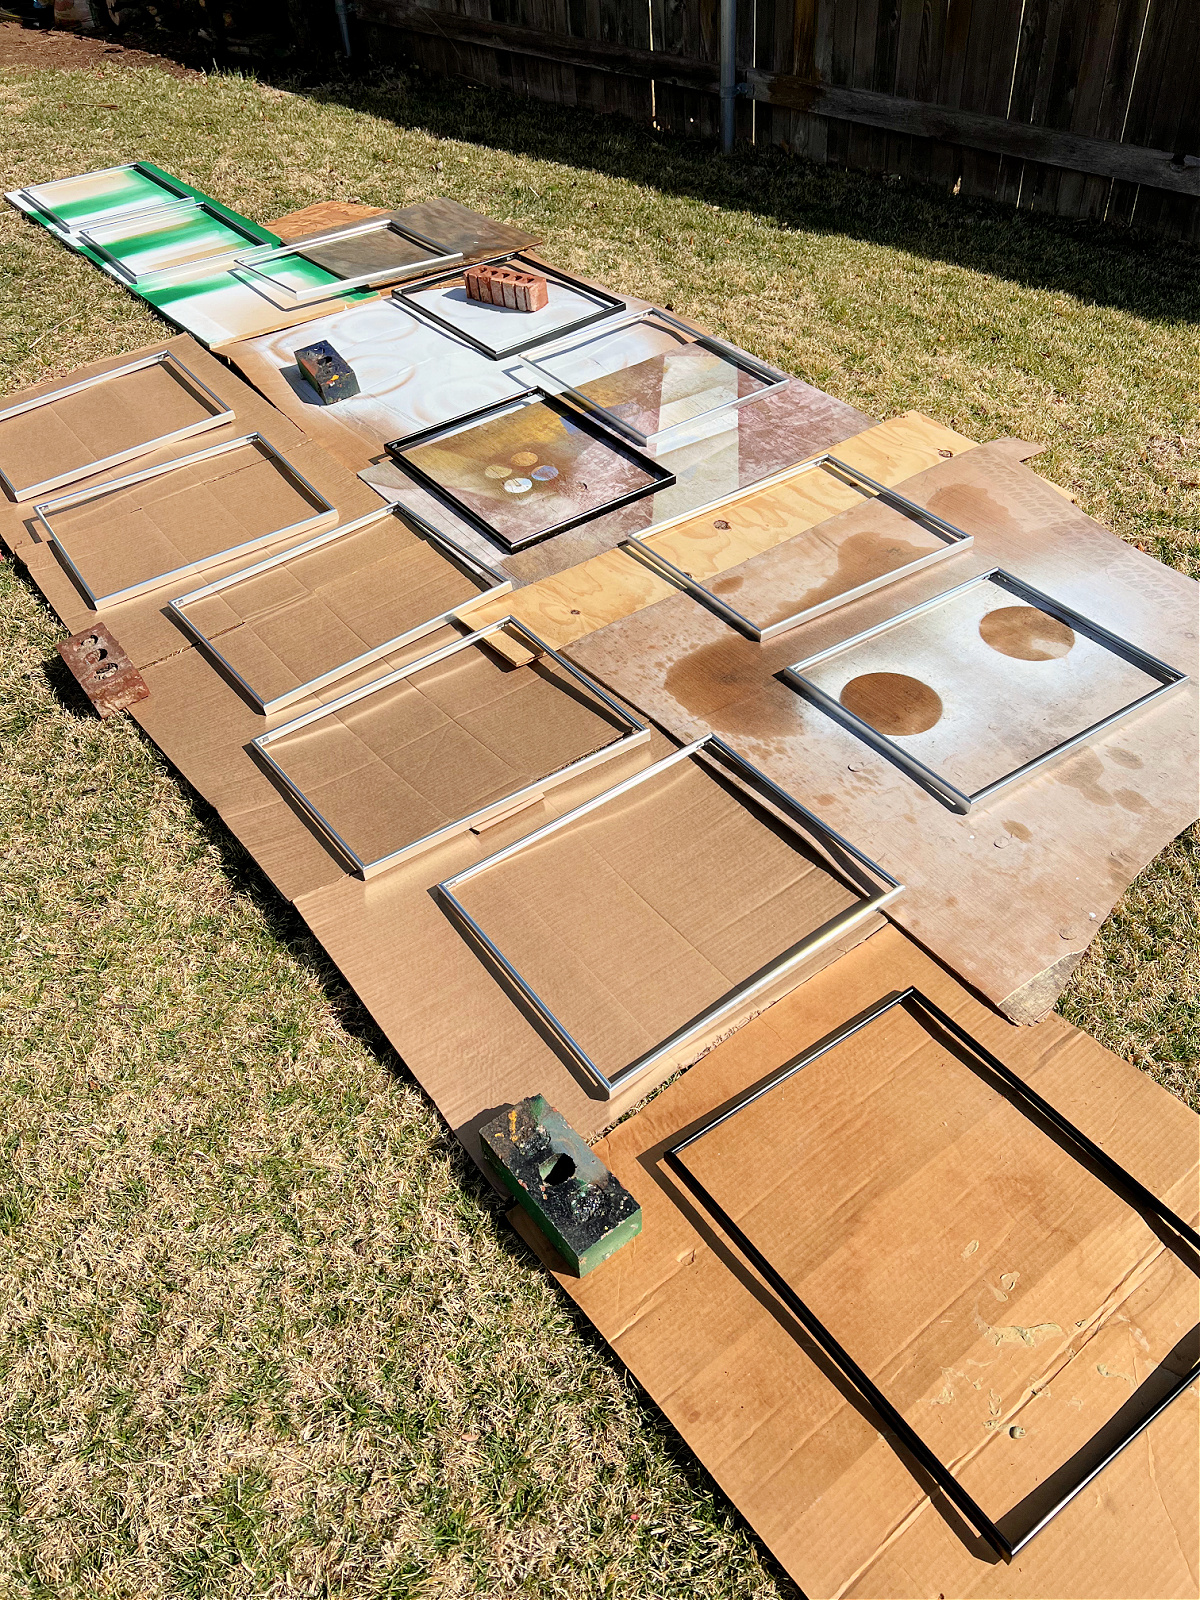
We've had several days where the weather was nice enough to spray paint so I got them all laid out and was able to paint them all fairly quickly.
I wanted a gallery look with large mats on this photo wall, so I used 8x10 photos in the 16x20 frames. I have cut my own mats for years and saved hundreds of dollars doing it myself. I invested in a mat cutter long ago so it has more than paid for itself, but the money I saved even on this project alone is more than the cost of the mat cutter. It's a nice tool to have on hand! I wrote a tutorial years ago for how to cut your own photo mat, the main thing you have to be careful of is to cut the opening slightly smaller than the print size so there are no gaps around the photo. (If you don't want to go to the trouble of purchasing or cutting your own mats, try the same method I used for my kitchen botanical wall! Super easy and cheap and hardly noticeable that it's not a proper photo mat once you're finished.) Here's a little peek of the mat cutting process-
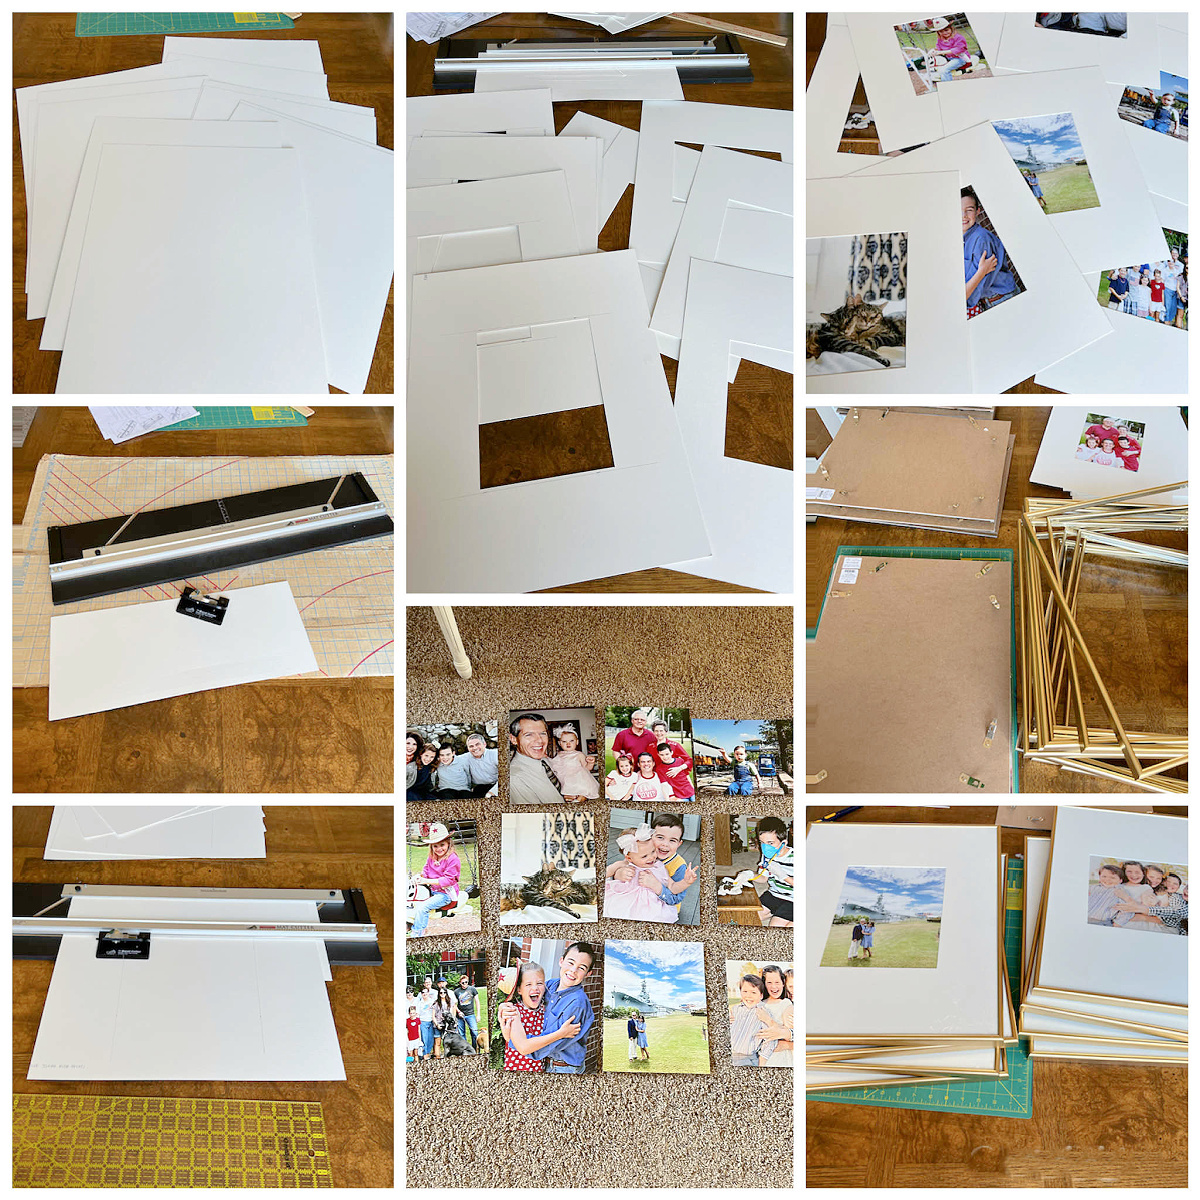
In the past I have always had photo enlargements printed at our local warehouse club but they've discontinued in-house service... it's getting more difficult to find local places that print on site. And even if they hadn't stopped, I had become dissatisfied with the quality of the prints and colors of the photos I received. The local photographers we've used for family photos over the years have always recommended having our photos printed by the MPix.com online photo lab. I've heard wonderful things about them and when they reached out and asked me to try out their service I was anxious to see for myself! I went through loads of digital files and rounded up a group of my favorite family photos from over the years to print for this wall. My thanks to MPix for providing the prints for my project!

I ordered the 8x10's plus several more to choose from for this wall, and some even larger prints for another upcoming project. The website was easy to navigate and loading up my photos was a breeze. It walked me through cropping my photos slightly if needed depending on the size and perhaps the thing I was most impressed with was their speedy delivery! I was crunched for time and selected the express shipping on my order, and from the time I submitted the order they were at my door less than 24 hours later. Impressive! I was planning another project at the same time and after the fact decided I wanted to order some additional large portrait size pictures, and even with regular shipping those were processed and at my door within 3-4 days. Wonderful customer service!
Lastly, I'd encourage subscribing to their email or checking the site often because they are always running a variety of sales. My 8x10's were only a couple of dollars each with a promotion they were offering at the time. Such an affordable wall art project, and who wouldn't want a large collection of photo art reminding them of their favorite memories with family and friends to look at each day?
I swapped out the old piano light for a pair of blue and white lamps, and although they block portions of some of the photos a bit I love the layered look. I also relocated the small brass trunk to the corner and left the top clear so I could store all of the extra piano music inside it. By the time I finished and got these hung yesterday I was racing the sun for photographs so the lighting isn't great and the glass causes a glare, but I couldn't love this space more now!
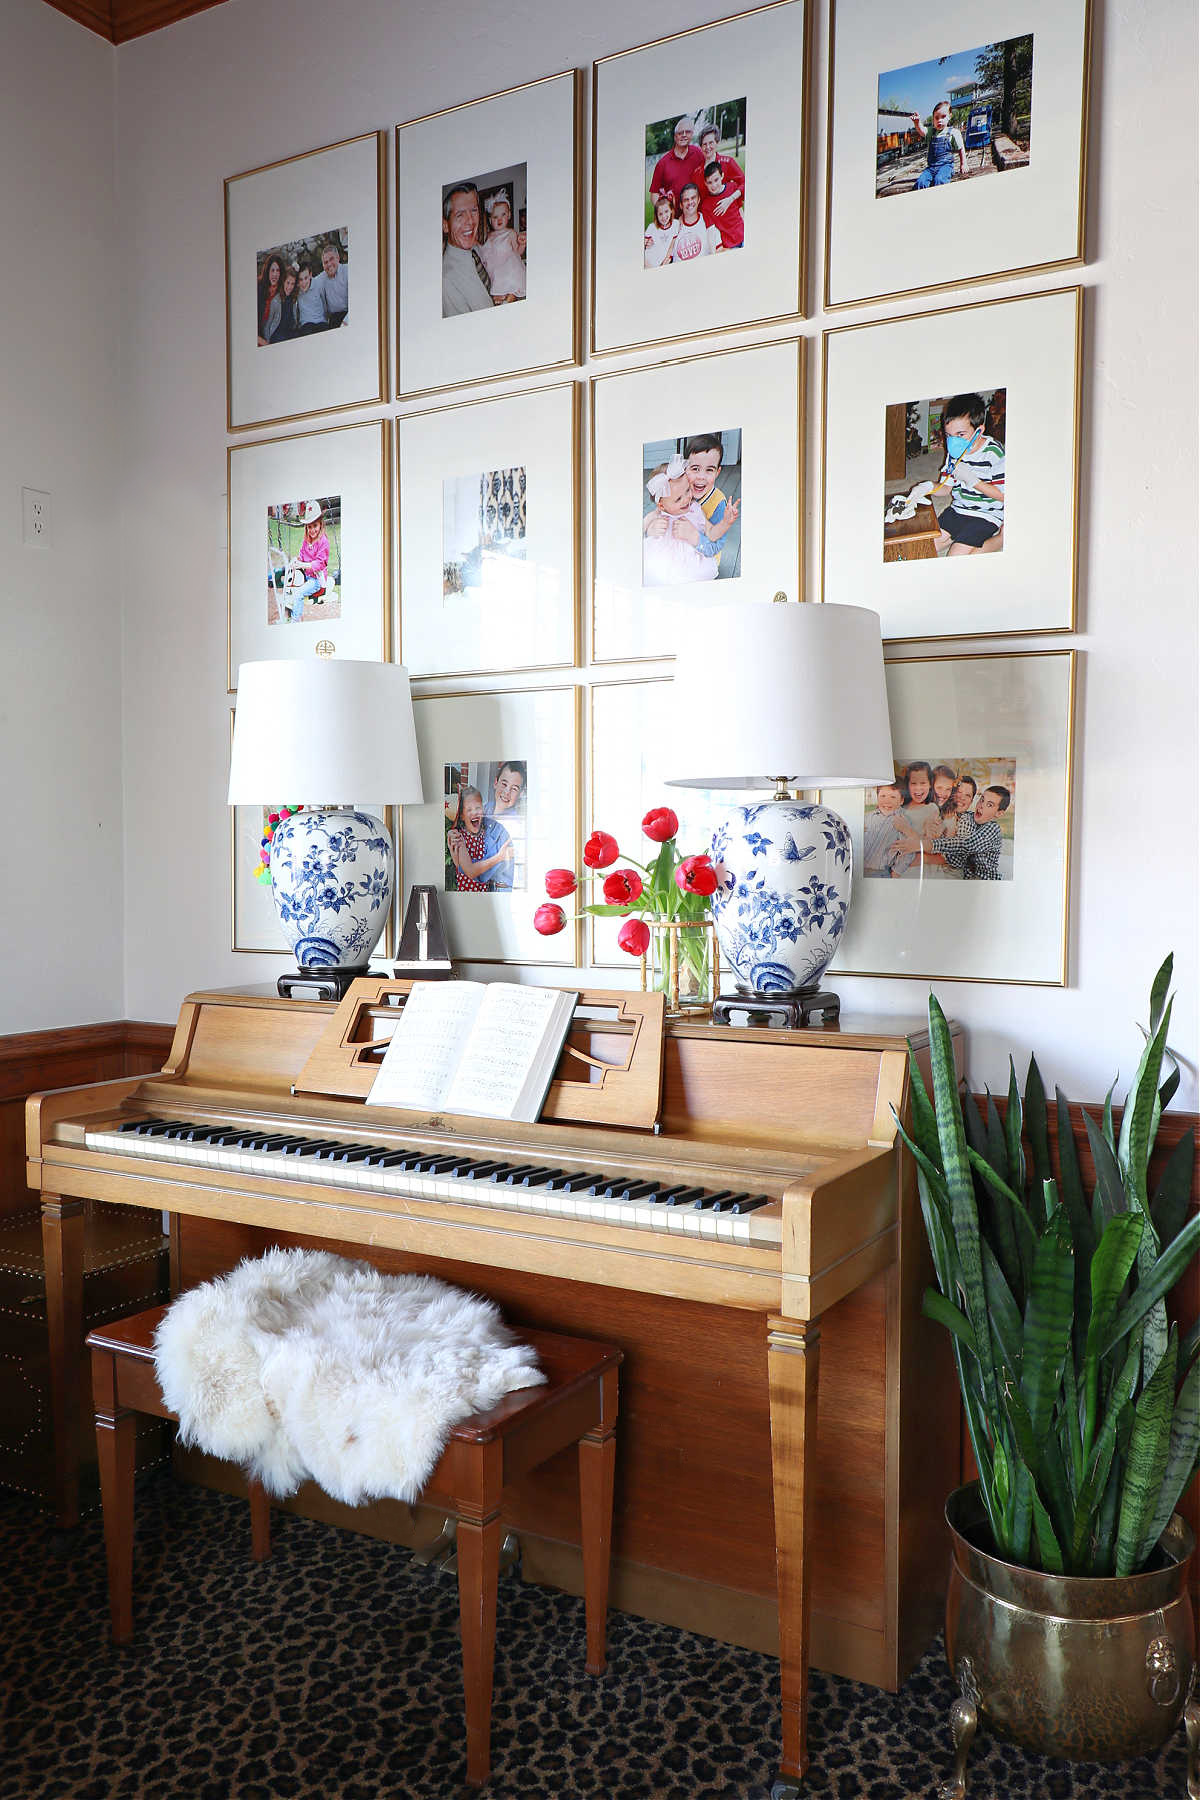
I forgot to mention earlier that this piano is around 50 years old. My parents bought it early in their marriage (it's already been over 2 years since we celebrated their 50th!) and when they upgraded years later this one was used by my Aunt, my sister, me, back to my sister, then back to me- ha! My kids took lessons for years and it still brings me so much joy when one the first things my daughter does any time she comes home from college is sneak away in here and play for a while to relax. I am so very happy with this little makeover, and working on these photos and post spurred on an idea to tweak this spot even a bit more! I'll keep you posted...
As I mentioned I'm switching some artwork up in a few other spots in the house, so I'm excited to wrap that up and share those spaces with you in the weeks to come.
SUPPLIES LIST:


If you enjoyed the tour today and have not yet done so, may I invite you to subscribe to the blog? You'll usually receive between 1-3 emails per week, only when there's a new post published. Subscribing is the best way to make sure you never miss a post! I'd also love to connect with you on Instagram, Facebook, and Pinterest!
Be sure to make the rounds today to visit all of the Spring Refresh projects, I'm looking forward to seeing each one of them!


Good to know about mPix and the sprayer gadget! And talk about adorable photos. Such a beautiful project that looks high-end!
ReplyDeleteLove the photo wall with color photos! That is good to know about mPix. I can see that a mat cutter would be a good investment!
ReplyDeleteAs an impulsive hoarder of frames, just love this inspiration. off to check out a mat cutter
ReplyDeleteDebra
What a great idea! Love the photos of everyone!
ReplyDeleteIt looks beautiful! I love the tip about cutting your own mats!
ReplyDeleteThis is such a beautiful idea! I was excited to share your post link with my followers in my From My Neck of the Woods weekend round up this past Sunday. ~ Kristin | White Arrows Home
ReplyDelete