
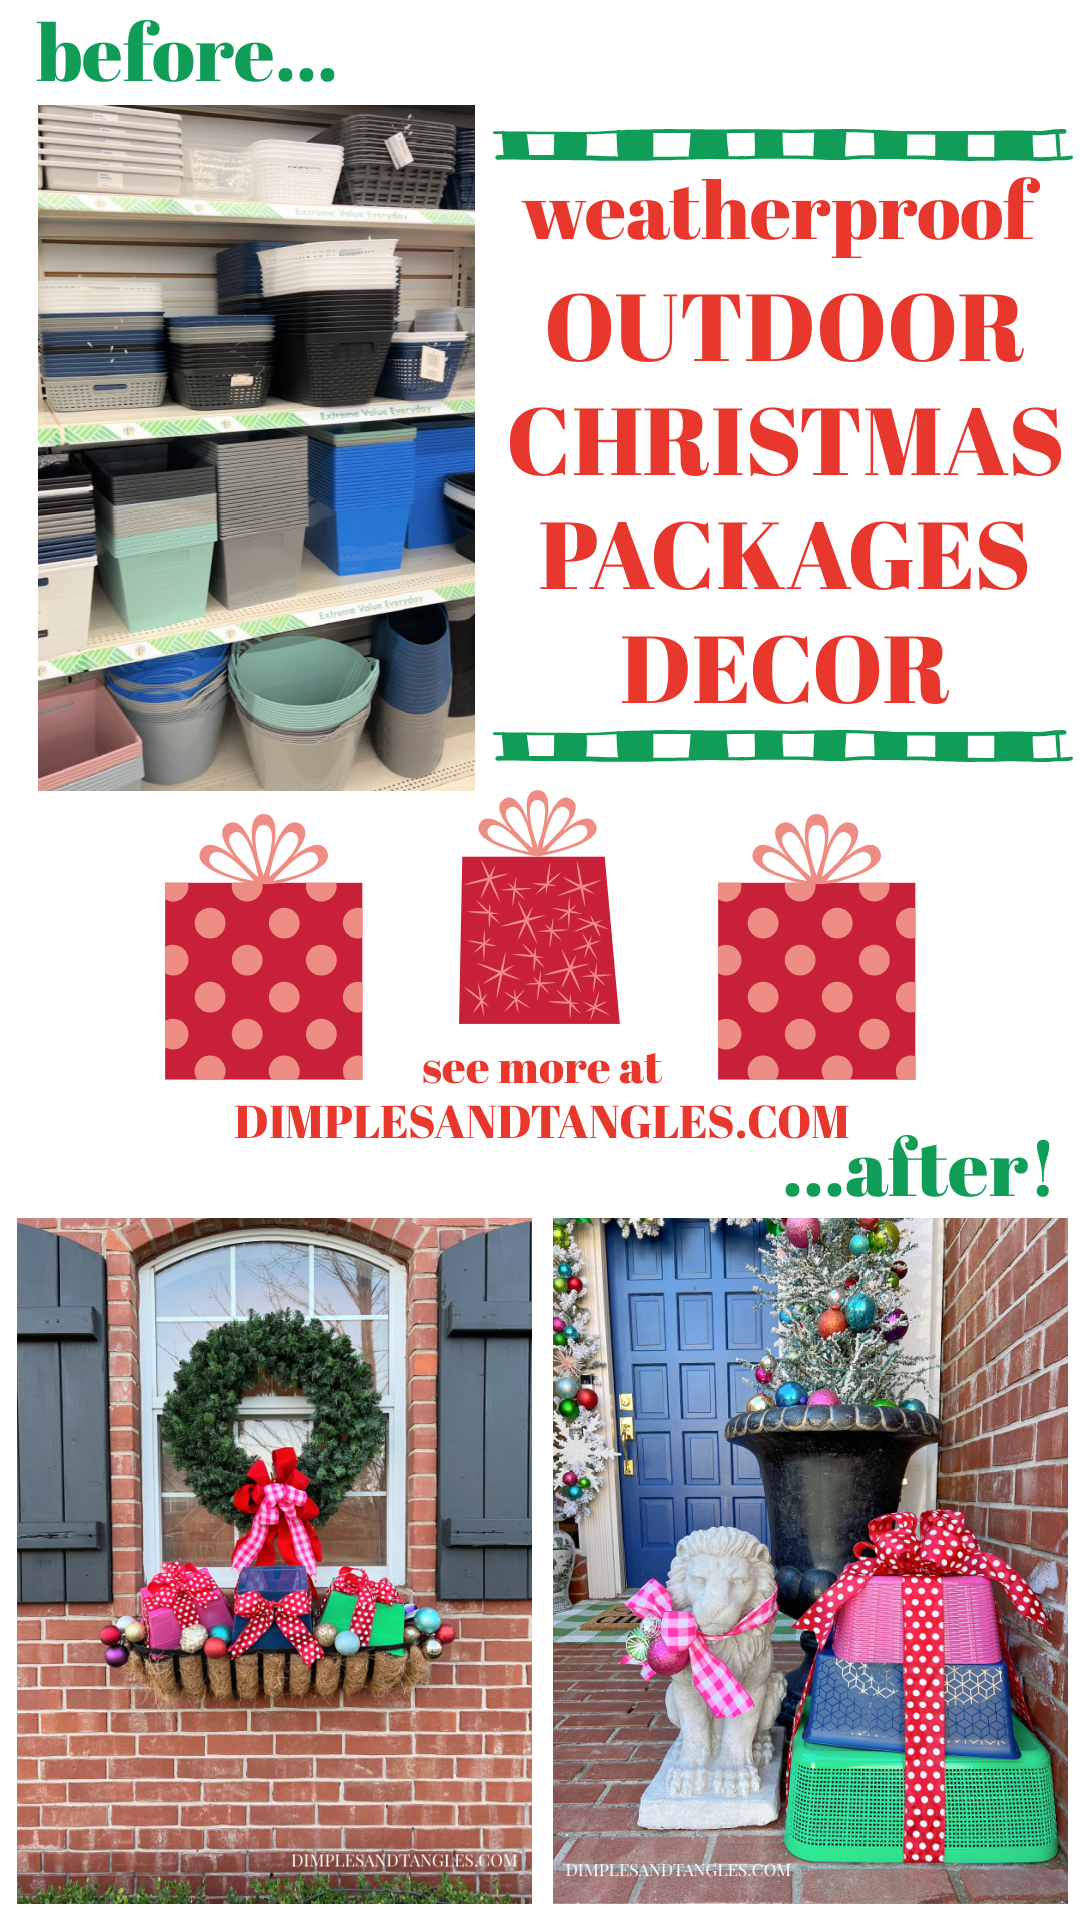
After mulling it over for a few days, I decided that I might be able to make some inexpensive plastic tubs work. I stopped by Dollar Tree and chose several different sizes to fit the window boxes and some larger ones for the porch. All that I selected were 1.25 each except for the largest base bin on the porch, it was in another spot of the store for $3.

I knew that I would likely have to change the color of the selection that was available, so I used a few of my favorites and sprayed some of the bins as needed- just the bottom and outsides. Disclaimer... I had to treat these somewhat gently afterwards, spray paint on slick plastic doesn't always adhere for the long haul but if I'm careful working with them it should be fine for this project, and I can touch up over the years if needed.

The cutest (subtle) sparkle sweatshirt || Fleece lined joggers || Similar beanie cap here or here || Spotted Sneakers || Rustoleum Spring Green & Krylon Hot Pink Spray Paint
Once painted, I positioned the stacked boxes for the porch how I wanted them, then I found it helpful to put a few tiny drops of hot glue in the corners to hold them together long enough for me to manipulate them while tying a big bow around them. After Christmas, I'll pop them apart and nest them inside each other... easy peasy to store!

The last thing was to wrap in a cute ribbon and bow and that's it!

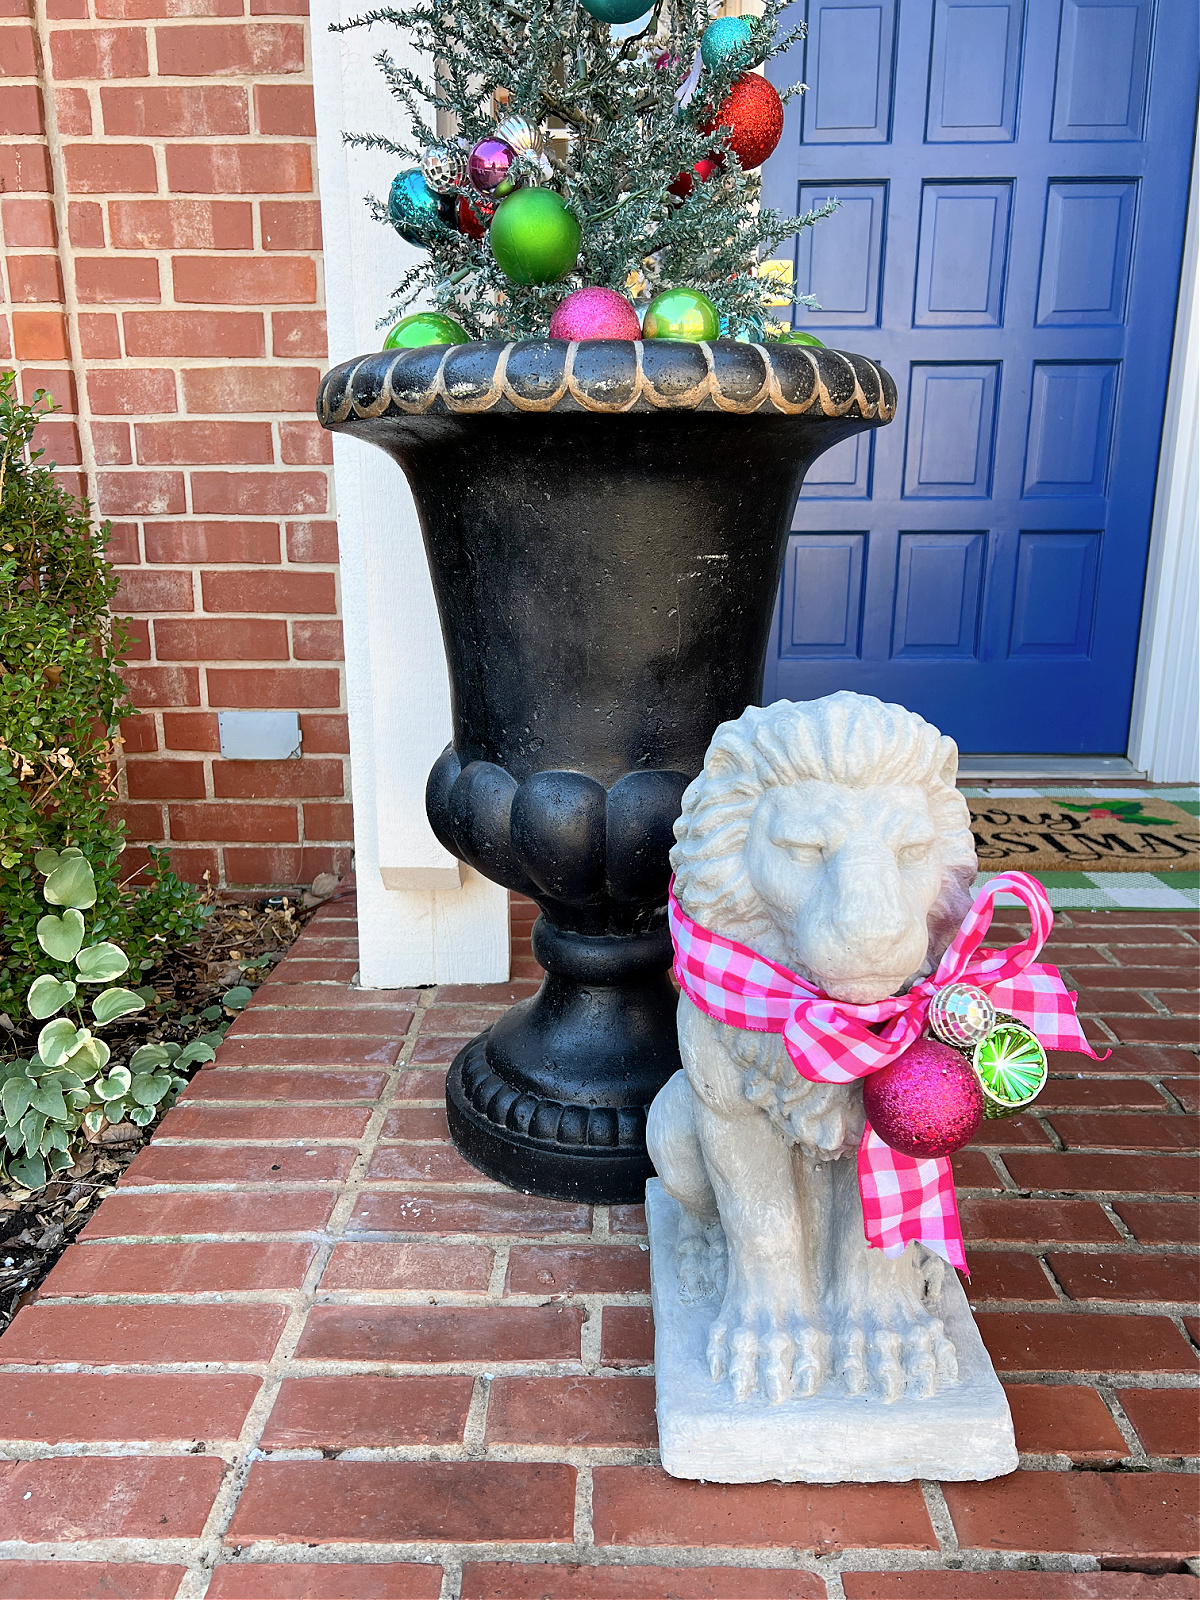
Polka Dot Ribbon || Hot Pink Gingham Ribbon || Black Urns (I added the gold detail) || Look for Less Urns || Door Color: SW Dignity Blue
I used smaller sized bins for the window boxes and I think they turned out so cute! Next time I'll hang the wreaths a bit higher, I put them up before I decided to fill the window boxes. I clustered several ornaments together with floral wire, then used a heavier gauge wire to secure them in place into the dirt.

I did the same for the boxes using the handle cut outs on the sides. I just made an arch with a heavy, longer piece of wire and stuck it down in the dirt to pin the bins down. Hopefully that's sufficient and they'll stay put. You know Oklahoma IS where the wind comes sweeping down the plain!

I think these will be ok in the wind but we shall see... I thought about putting a brick on top of the green box, hidden under the blue box to weigh it down. I'll untie the ribbon and do something like that if it proves necessary.

So what do you think? Any ideas for something better I could have used? I would have preferred for the bins to have completely straight sides rather than a slight slope, but I worked with what I could find. Happy with how they turned out!
Never miss a post!
Subscribe to Dimples and Tangles and receive notice in your inbox each time a new post is published. Click here to subscribe!

So beautiful as always! Just perfect!
ReplyDeleteLove it! You do such a good job every holiday!
ReplyDeleteSo creative!! Turned out beautiful! :)
ReplyDeleteThese look adorable! I had another thought: what if you took various sizes of cardboard boxes and wrapped them like presents? You could use those colored plastic tablecloths Dollar tree sells to wrap them. If they were too thin you could double the tablecloth plastic to make it thicker. At least it would survive the wet weather! Just another idea, I always love what you do!
ReplyDeleteOh that's a good idea too!
DeleteHow darling and so you! I love that you share affordable ideas and think ‘outside the box’!
ReplyDeleteThe wind is blowing in Oklahoma today isn’t it???!!!💨
Sure enough!!
Delete